Ever stood at the base of a climb, palms sweaty, staring at your friend’s rack thinking, “Is that a weird cheese grater… or life-saving gear?” If your first attempt to buy beginner rock climbing gear left you overwhelmed by cams, nuts, hexes—and those mysterious metal triangles called tricams—you’re not alone. I once bought a set of tricams before I’d even led a single pitch. Spoiler: they sat in my closet for two years while I fumbled through trad with overpriced cams and near-constant rope drag.
This guide cuts through the noise. We’ll cover exactly what beginner rock climbers need (hint: tricams aren’t it), explain why some gear is worth skipping early on, and share hard-won lessons from the crag—not Amazon reviews. You’ll learn:
- Which core pieces are non-negotiable for starting out
- Why tricams, despite their cult following, belong in Phase 2
- How to avoid wasting $300 on gear you won’t use for 12+ months
Table of Contents
- Why Your First Rack Sets the Tone
- Step-by-Step: Building Your Starter Kit
- Pro Tips Most Guides Won’t Tell You
- Real Talk: My First Year Gear Mistakes
- FAQs About Beginner Rock Climbing Gear
Key Takeaways
- Harness, shoes, helmet, belay device, and rope are your absolute essentials—buy quality here.
- Tricams are niche, technique-sensitive, and not beginner-friendly; save them for when you’re placing gear confidently.
- Rent or borrow trad protection (cams/nuts) until you’ve taken a lead course and done 5–10 guided pitches.
- Used gear markets (like Mountain Project or local shops) can save you 40–60% on non-critical items.
Why Your First Rack Sets the Tone (And Why Tricams Can Wait)
Let’s be real: walking into an outdoor shop as a new climber feels like entering a sci-fi prop room. There’s gear with names like “Micro Camalot,” “Offset Stoppers,” and yes—“Tricams.” These little three-pointed passive/active hybrids have a loyal following among seasoned trad climbers, especially on parallel-sided cracks where cams struggle. But for beginners? They’re like trying to drive stick shift on your first day behind the wheel.
According to the Access Fund’s 2023 Climbing Participation Report, over 68% of new climbers start indoors on top-rope walls. Even among those jumping straight to outdoor sport climbing, fewer than 12% attempt traditional (“trad”) leading in their first year. Yet too many blogs—and well-meaning climbing partners—push “full racks” onto novices who just want to send 5.8 without flipping upside down.
Here’s the truth: buying tricams before you understand how to place a standard nut or assess rock quality isn’t just wasteful—it’s potentially unsafe. Tricams require precise placement technique and a nuanced feel for rock features. Place one poorly, and it can walk, spin, or pop under load. As certified AMGA Rock Guide and gear tester Lena Hayes puts it: “Tricams reward experience. They don’t build it.”
Step-by-Step: Building Your Starter Kit (Without Breaking the Bank)
What gear do I absolutely need as a total beginner?
Optimist You: “Just grab the basics and hit the wall!”
Grumpy You: “Ugh, fine—but only if ‘basics’ doesn’t include a $90 chalk bag shaped like a Yeti.”
Focus on these five non-negotiables:
- Climbing Shoes: Neutral fit, lace-up or Velcro (e.g., La Sportiva Tarantulace, Evolv Defy). Avoid aggressive downturns—they’ll crush your toes and teach bad footwork.
- Harness: Adjustable leg loops, gear loops, and a haul loop (e.g., Black Diamond Momentum). Size matters—try before you buy.
- Helmets: UIAA/CE-certified (e.g., Petzl Boreo). Falling rock and swinging leads don’t care how “light” your hair is.
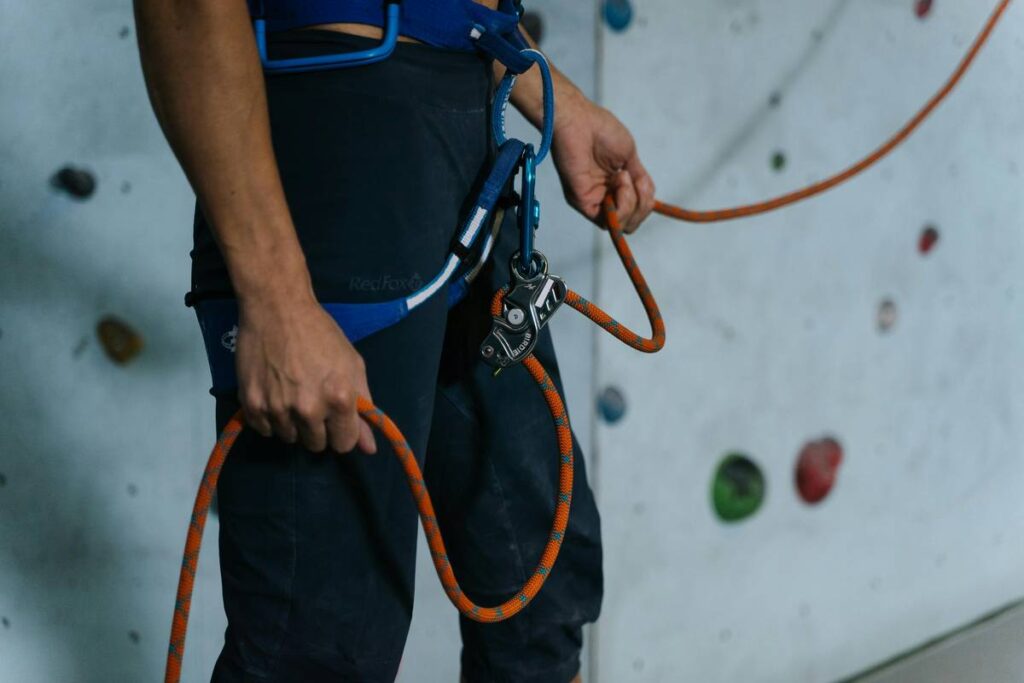
- Belay Device: Assisted-braking devices like the Petzl GriGri are ideal for learning control and safety.
- Rope: For top-rope or gym: 30m dynamic rope. For outdoor sport: 60–70m, 9.2–9.8mm diameter (e.g., Mammut Eternity).
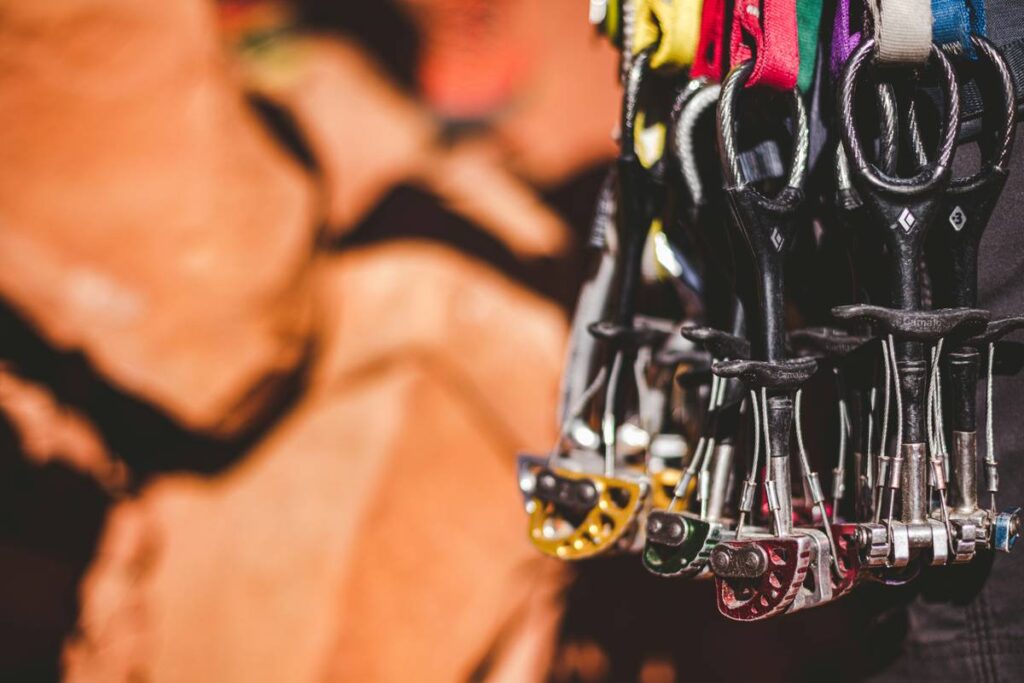
Should I buy trad gear like cams or tricams right away?
No. Not unless you’ve signed up for a multi-day trad course with a certified guide (AMGA or IFMGA). Until then:
- Rent a rack from your local guiding service or climbing gym.
- Borrow from experienced friends—watch how they inspect, place, and clean gear.
- Practice placements on the ground using a “mock lead” setup.
Pro Tips Most Guides Won’t Tell You
1. Skip the “starter trad rack” bundles
Those pre-packed kits often include sizes you won’t use (e.g., #0.3 cams) and omit critical mid-range sizes. Build your rack based on your local crag’s typical crack widths (research via Mountain Project).
2. Used is safe—for non-life-critical gear
Shoes, chalk bags, slings? Buy used. Ropes, harnesses, helmets? Always new. The UIAA Safety Guidelines recommend retiring ropes after heavy use or visible sheath damage—never risk it.
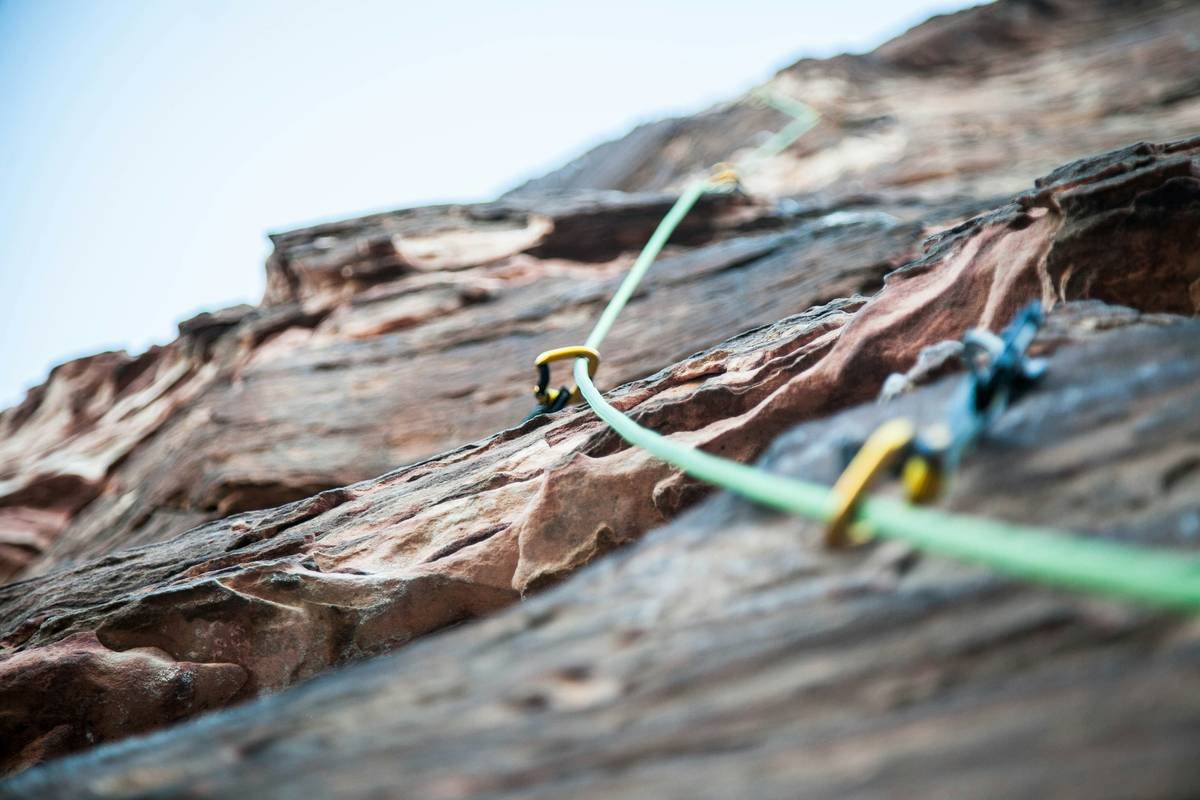
3. Tricams shine in specific scenarios—learn them later
Once you’re placing gear regularly, tricams excel in:
– Flared pin scars
– Shallow pockets
– Parallel-sided limestone or quartzite cracks
But they fail miserably in dirty, wet, or soft rock. Master Black Diamond Hexes or DMM Wallnuts first—they’re more forgiving and teach fundamental placement logic.
🚫 Terrible Tip Alert:
“Just buy everything and figure it out!” — This is how beginners blow $800 on gear they never use and skip foundational skills. Don’t be that person.
Real Talk: My First Year Gear Mistakes
I showed up to Indian Creek (famous for its parallel cracks) with a shiny new set of CCH tricams after watching one YouTube video. My partner—a 10-year trad veteran—glanced at my rack and said, “Cool… but do you know how to set the trigger?” I didn’t. I placed one upside down. It fell out during cleaning. Later, I tried using it in a flared crack. It walked sideways and nearly pulled free during a fall simulation.
After two near-misses, I swapped it for a Black Diamond #4 Camalot—which held solidly. Moral? Technique > gear. Today, I own tricams—but only after 20+ days of guided trad and hundreds of ground placements. They’re now my secret weapon in Pin Scars at Lumpy Ridge… but that took time.
FAQs About Beginner Rock Climbing Gear
Do I need tricams as a beginner rock climber?
No. Tricams require advanced placement technique and situational awareness. Focus on mastering cams and nuts first. Most beginner-friendly crags (like Red River Gorge or Smith Rock sport areas) don’t require them.
How much should I spend on beginner rock climbing gear?
A solid starter kit (shoes, harness, helmet, belay device, rope) costs $400–$600 new. Buy used where safe to cut costs by 30–50%. Avoid “budget” ropes or helmets—safety isn’t the place to skimp.
Can I climb outdoors without owning trad gear?
Yes! Start with top-rope anchors (set by others) or sport climbing (bolts already in place). Many gyms offer outdoor sport lead classes that provide gear rentals.
When *should* I buy tricams?
Consider tricams after:
– Completing a trad lead course
– Placing 20+ clean gear pieces on real rock
– Climbing at areas known for tricam-friendly features (e.g., Vedauwoo, City of Rocks)
Final Thoughts
Your journey into rock climbing shouldn’t start with deciphering arcane gear hieroglyphics. Prioritize safety, simplicity, and skill-building. Invest in quality essentials, rent the rest, and leave tricams for when you’re ready to geek out on micro-placement nuances. Remember: the best gear is the gear you understand—not the gear that looks cool on Instagram.
Now go tie in. The wall’s waiting.
Like a Tamagotchi, your rack needs daily attention—inspect, clean, and retire gear responsibly.
Metal wings gleam cold,
Rock whispers through cam teeth—wait.
First, learn to fall safe.