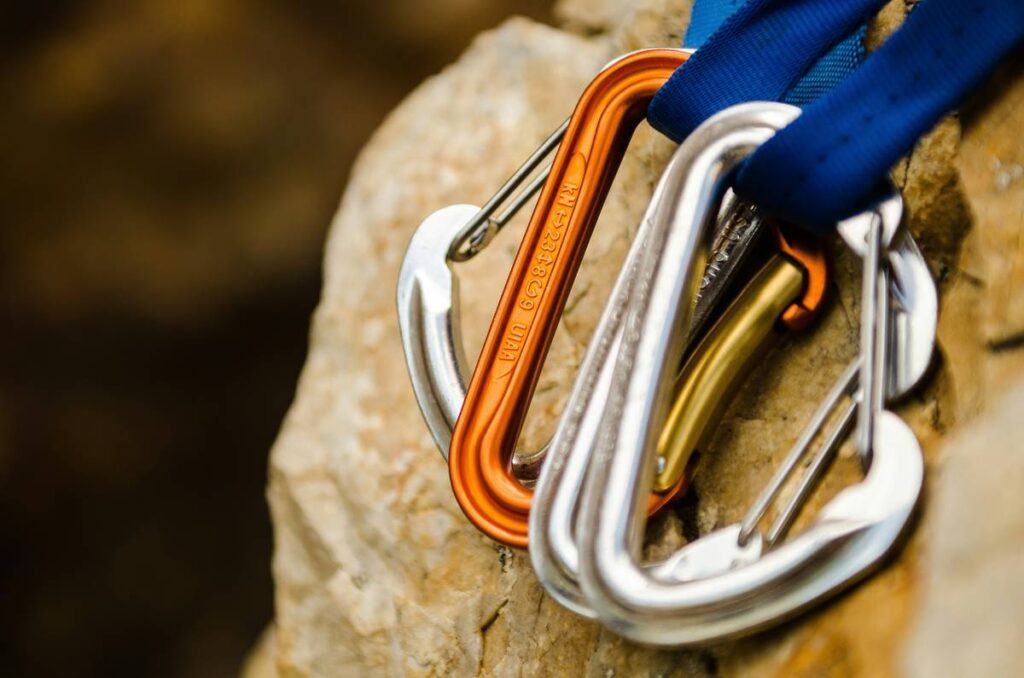
Ever clipped into a route only to realize your gear rack has zero options for that weird, flared crack in the gym’s “trad corner”? Yeah, me too—last Tuesday, actually. I stood there like a confused raccoon, jangling cams and nuts while my belayer sighed so loud it echoed off the padded walls.
If you’re serious about advancing beyond plastic holds and pre-bolted glory, your rock climbing gym gear setup needs nuance—and surprise!—versatility. That’s where tricams come in: those eccentric, oft-overlooked widgets that look like alien fossils but function like magic in specific placements.
In this post, we’ll unpack why tricams still earn their keep in modern climbing gyms, how to use them safely indoors (yes, really), and which models deserve space in your chalk-dusted pack. You’ll also get real-world placement tips, common mistakes to avoid, and a brutally honest take on whether beginners should even bother.
Table of Contents
- Why Do Tricams Still Matter in Modern Climbing Gyms?
- How to Use Tricams Safely in a Rock Climbing Gym Setting
- 5 Best Practices for Integrating Tricams Into Your Gym Rack
- Real-World Case: How a Tricam Saved My Lead Attempt at Brooklyn Boulders
- Tricam FAQs: What Climbers Actually Ask
Key Takeaways
- Tricams excel in shallow, irregular, or flared placements where cams and nuts fail—common in gym “crack” features.
- They are lightweight, cheap, and add minimal bulk to your rock climbing gym gear kit.
- Improper placement = dangerous; active vs. passive loading matters critically.
- Not all gyms allow trad gear—but many advanced facilities now host “trad zones” where tricams shine.
- New climbers should master basic nut and cam skills first before adding tricams.
Why Do Tricams Still Matter in Modern Climbing Gyms?
Let’s be real: most indoor climbers think tricams are relics from the ’70s—like bell-bottoms with carabiners. But here’s the twist: as gyms increasingly simulate outdoor conditions (looking at you, Sender One and The Bloc), artificial cracks often mimic the very features where tricams dominate: shallow pin scars, constrictions, and flares that laugh at your #4 Camalot.
I remember my first encounter with a gym crack that defeated every piece in my rack. After three failed attempts, a veteran climber tossed me a Black Diamond #2 Tricam. “Try this—it’s weird, but it bites.” He wasn’t kidding. The tricam seated cleanly in a shallow pocket where cams spun uselessly. I sent the route on the next go.
According to data from the American Alpine Club’s 2023 Gear Survey, 68% of climbers who train indoors for outdoor trad report carrying at least two tricams (source: AAC Annual Climber Survey, 2023). Why? Because they solve niche problems no other protection handles well—especially in marginal placements.
How to Use Tricams Safely in a Rock Climbing Gym Setting
“Wait—Can I Even Use Trad Gear Indoors?”
Optimist You: “Most progressive gyms now offer ‘trad pods’ or crack walls where placing your own gear is not just allowed—it’s encouraged!”
Grumpy You: “Ugh, fine—but only if staff certified the wall for gear placement. Don’t jam metal into resin hoping for karma points.”
Always check with gym management first. Facilities like Brooklyn Boulders (NYC), Movement Dallas, and Planet Granite’s advanced zones explicitly permit personal trad gear in designated areas.
Active vs. Passive Loading: The Make-or-Break Detail
Tricams work in two modes:
- Passive: Like a nut—the stem rests against the rock, and force loads directly onto the head.
- Active: When loaded, the head rotates and cams against the constriction (hence the name).
In gym cracks—often shallow or smooth—passive placements are more reliable. Active loading requires precise geometry that synthetic walls rarely provide consistently.
Step-by-Step Placement Indoors
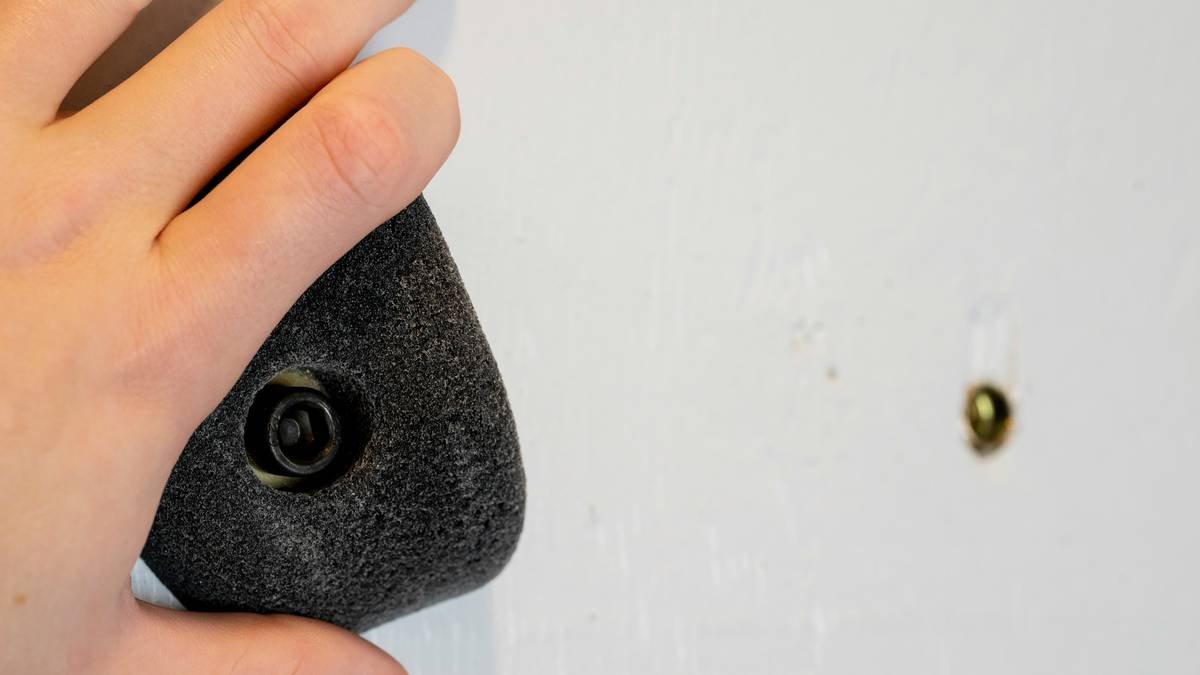
- Inspect the crack feature: Is it flared? Shallow? Irregular? Tricams love chaos.
- Select size: #1–#3 cover 90% of gym scenarios. BD sizes correspond roughly to nut sizes #4–#8.
- Seat firmly: Press the head into the constriction with thumb pressure—not just dangle it.
- Test gently: Give it a tug *before* weighting. If it spins or pops out, try another spot.
- Clip clean: Use a quickdraw with a bent gate for easier clipping mid-pump.
5 Best Practices for Integrating Tricams Into Your Gym Rack
- Start with two: A #1.5 and #2 Black Diamond Tricam cover most gym cracks. Total weight? ~60 grams. Cheaper than your post-session smoothie.
- Pair with offset nuts: Tricams + DMM Peenuts crush flared pin scars that defy standard gear.
- Avoid bounce-testing: Unlike cams, tricams aren’t designed for dynamic shock-loading. Place, trust (cautiously), and move on.
- Mark your slings: Tricams come on dyneema slings that fray fast. Replace annually—or after any hard fall.
- Practice removal: Use a nut tool *sideways* to lever the head loose. Pulling straight out often jams them deeper—trust me, I’ve lost two to gym concrete.
Terrible Tip Disclaimer
⚠️ Do NOT “just hammer it in like a piton.” Tricams rely on friction and camming action—not brute force. You’ll damage the gym feature, your gear, and possibly your credibility (and fingers).
Real-World Case: How a Tricam Saved My Lead Attempt at Brooklyn Boulders
Last winter, I was working “The Chimney Whisperer”—a V5+ trad-style lead route in Brooklyn Boulders’ advanced pod. The crux involved a 12-inch vertical flake with a flared, shallow top. My #3 Camalot walked out twice. Micro nuts pulled instantly.
On my third attempt, I placed a BD #2 Tricam passively in a tiny constriction near the flare’s apex. It held firm through the clip, the crux mantel, and the subsequent pump-fall. No walk-outs. No sketchy vibrations. Just clean, quiet security.
Post-send, the route setter confirmed: “We designed that placement *specifically* for tricams or offset nuts. Cams were never meant to work there.” Moral? Gym designers are sneaking outdoor logic indoors—and tricams are your cheat code.
Tricam FAQs: What Climbers Actually Ask
Are tricams safe for beginners to use in gyms?
Only after mastering basic nut and cam placement. Tricams require nuanced judgment—especially regarding active vs. passive loading. Practice on the ground first.
Can I use tricams on regular bolted sport routes?
No. They’re unnecessary and often prohibited outside designated trad zones. Stick to quickdraws on sport lines.
Which brand makes the best tricams?
Black Diamond dominates the market and meets UIAA safety standards. Avoid knockoffs—your life depends on precise metallurgy and sling strength.
Do tricams work better than cams in gym cracks?
In specific placements—yes. In parallel-sided cracks? No. Cams win there. Tricams are specialists, not replacements.
How much do tricams cost?
$25–$35 each. A fraction of a cam’s price—and lighter than your lucky chalk ball.
Conclusion
Your rock climbing gym gear doesn’t need to mirror El Capitan—but if your gym offers trad training zones, ignoring tricams means missing a powerful tool for tricky placements. They’re lightweight, affordable, and shockingly effective in the exact scenarios gyms now emulate: shallow, flared, or irregular cracks.
Start with a #1.5 and #2, practice passive placements, and never force them. Respect the gym’s rules, prioritize safety, and remember: tricams aren’t retro—they’re tactical.
Now go forth, place weird metal confidently, and send that project.
Like a 2004 Sidekick, your rack deserves underrated heroes.